AWS with Ansilble – Getting connected
AWS with Ansilble – Getting Connected
This is the first part of hopeful a series of post on the subject on running and creating a infrastructure at Amazons Cloud service – AWS.
If a AWS account is not available then Amazon is offering a startup service to explore AWS. Check it out here
So Ansible contains a number of modules for Amazon Web Services. The purpose of this section is to explain how I use Ansible to create AWS instances
To use ansible with AWS you have to have some prerequisites up these are minimal.
- Ansible – of cause
- boto – a pip module. Install it with pip install “pip install boto”
Using version of boto 2.49.0of and ansible 2.5.2
The access
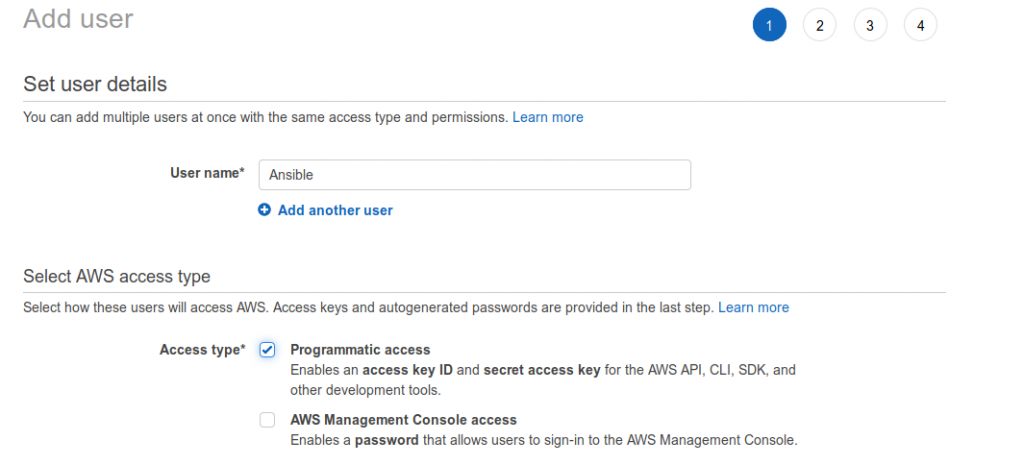
AWS recommend creating an IAM user that has access keys rather than relying on root access keys. So this have I already done. But it is straight forward thing to do.
Check out the documentation with the link above or go to account settings and “Your Security Credentials” and the Users. And Add user
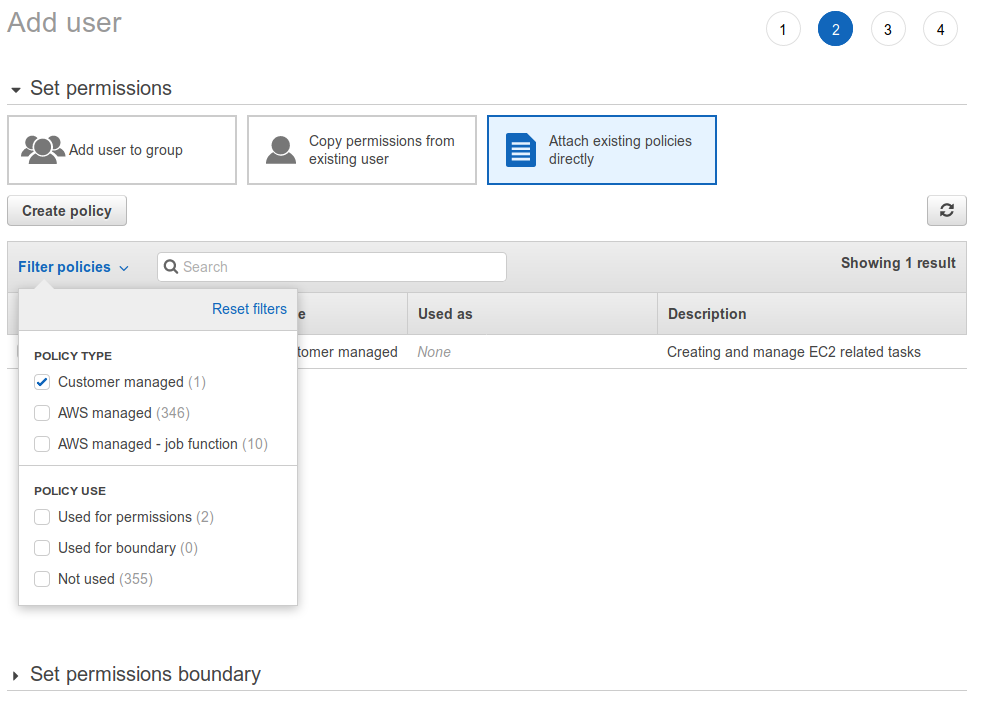
create policy and review it and the create it. Close windows that opened when choosing “Create Policy” . Filter on policies and click “custom managed”, Refresh if nothing appear at first
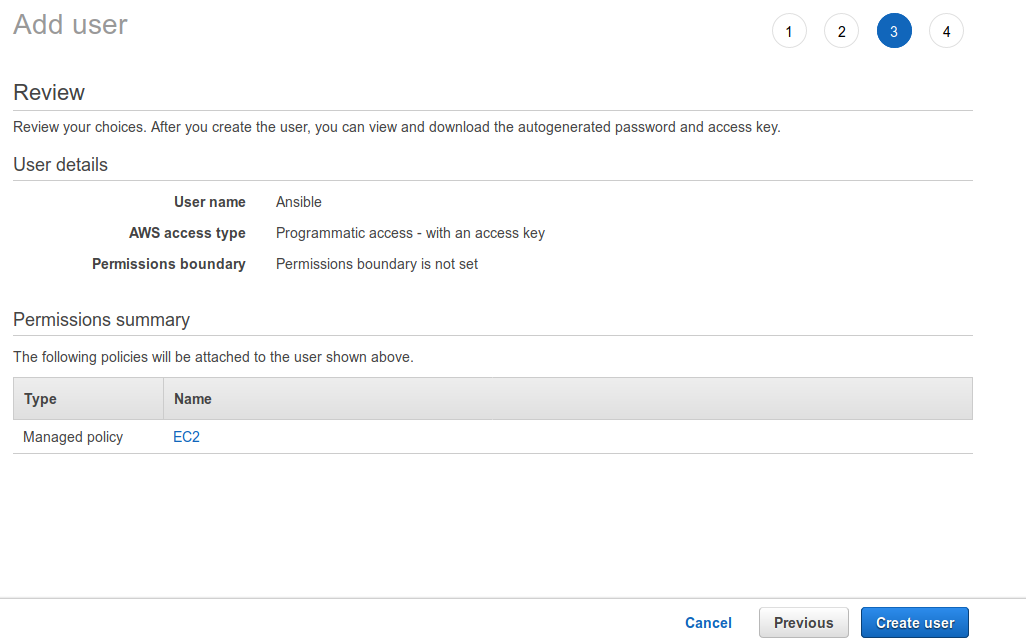
I have chosen to make a service account that can not be used for login into the AWS console. And called it ansible because that is what I am going to use it for
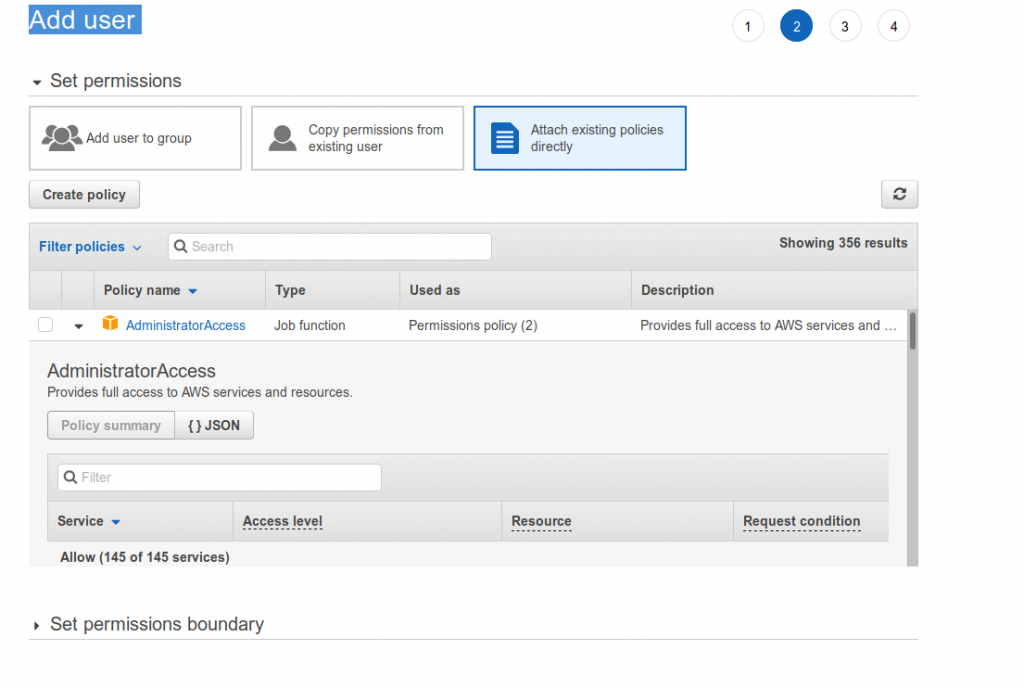
So now it is the permissions for the new user. I really like the policy based access control feature. It is easy to bundle them into a role or add a new policy to an existing role.
I choose to create a new policy
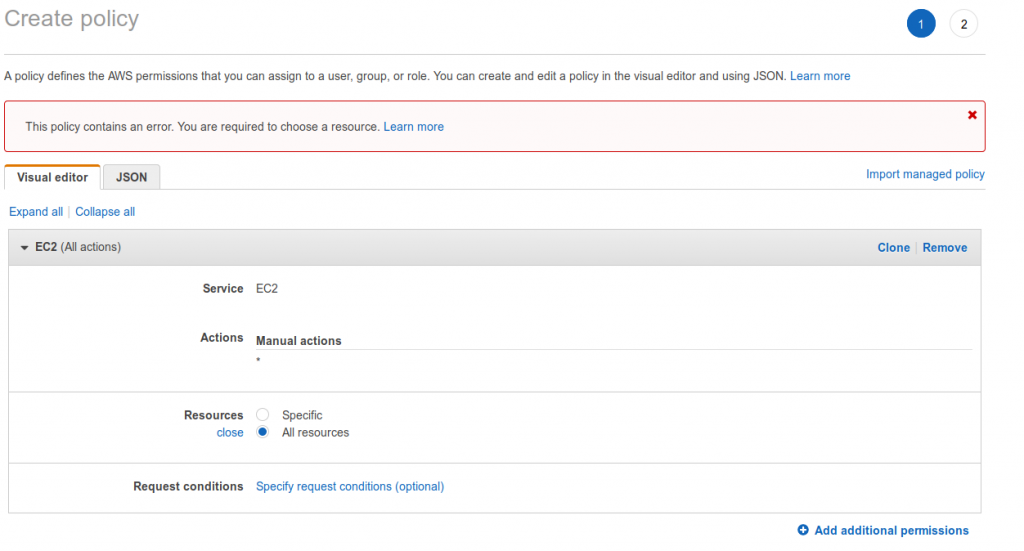
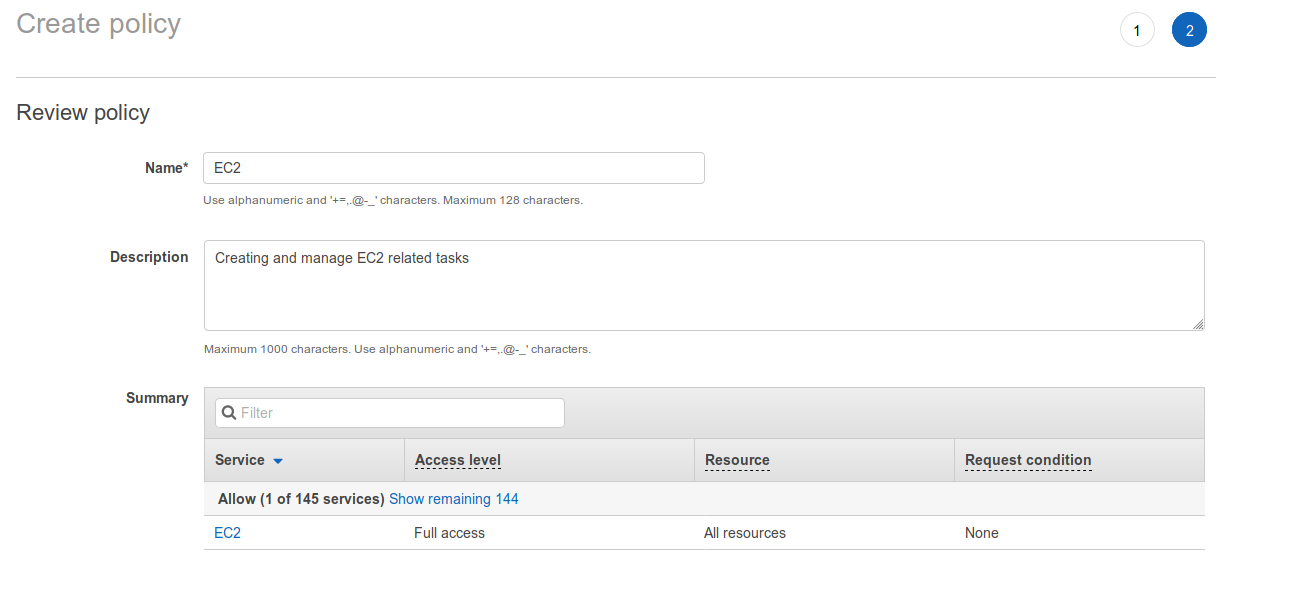
Creating policy maybe the hardest thing to do. Or it might depends on the security level. It is a two step process – Create and review.
This account is going to be used to create new instances on existing networks but also to spin up a whole network of VPC’s, Networks, clusters of server. Below gives access to the EC2 service with full access level. Quite a few selected access. And it shows what resource type the action is implemented in.
Step 1)

Step 1.1
In juction with crates so last screenhot the is the resourse path. Here you can control the access to a specifik resource
Step 2)
Give the policy a name that easily defines what the policy is used for the fill out the description for a more detailed information. Reviewing the policy and confirm it is correct or else rinse and release.
To make it easier to find the just created policy tap filter and choose “Customer managed” and it is possible to see all custom created policies
Tick off the desired policy and create the user at the bottom

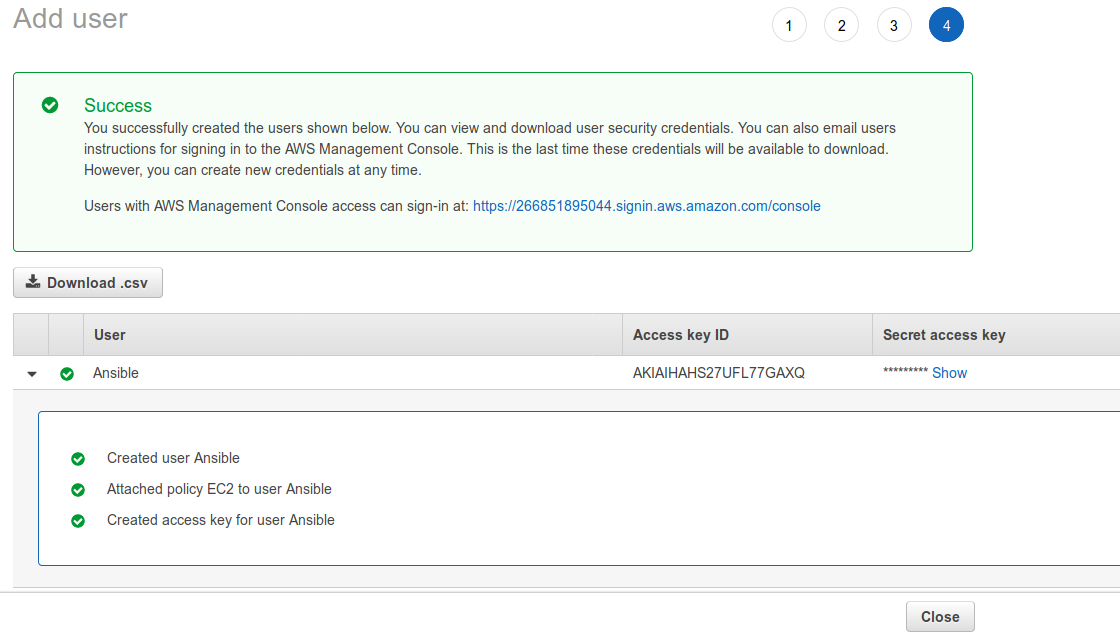
When created with success following screen will show a access key ID and a secret access key. Download the csv file for after leaving this screen it will not be posible to see the Secret access key again.
So Remember to DOWNLOAD THE KEY